Hammock underquilt manual – check how to use it and check alternative use.
GLOW hammock underquilt manual.
First – what is underquilt hammock? A hammock underquilt also called a hammock under quilt, is a quilt that wraps around the hammock from underneath. It provides hammock insulation and thermal comfort while sleeping in the hammock. A sleeping bag or top-quilt together with under-quilt or under a blanket makes a hammock sleeping system.
The model name (e.g. GLOW -12C, GLOW -2,C et,c.) indicates temperature rating – comfort temperature (Check details here).
We designed the GLOW comfortable hammock underquilt for you to stay warm during winter hammock camping. It provides excellent hammock insulation and fits any hammock thanks to an independent suspension system.
Every detail, from the selection of the right amount of the goose down, through the outer fabric used, to the plastic clamps, should be as light as possible while maintaining its full functionality. All of the elements are connected in such a way that there is no need to use force when hanging.
Thanks to this approach, our goose down under quilts earned a fully deserved reputation as one of the absolute lightest on the market.
The consequence of such design assumptions is that there are no excess reinforcements or underestimated strengths.
Safety and adjustment.
The safety of use and the adjustment of the underquilt are ensured by a suspension system built with elastic cords.
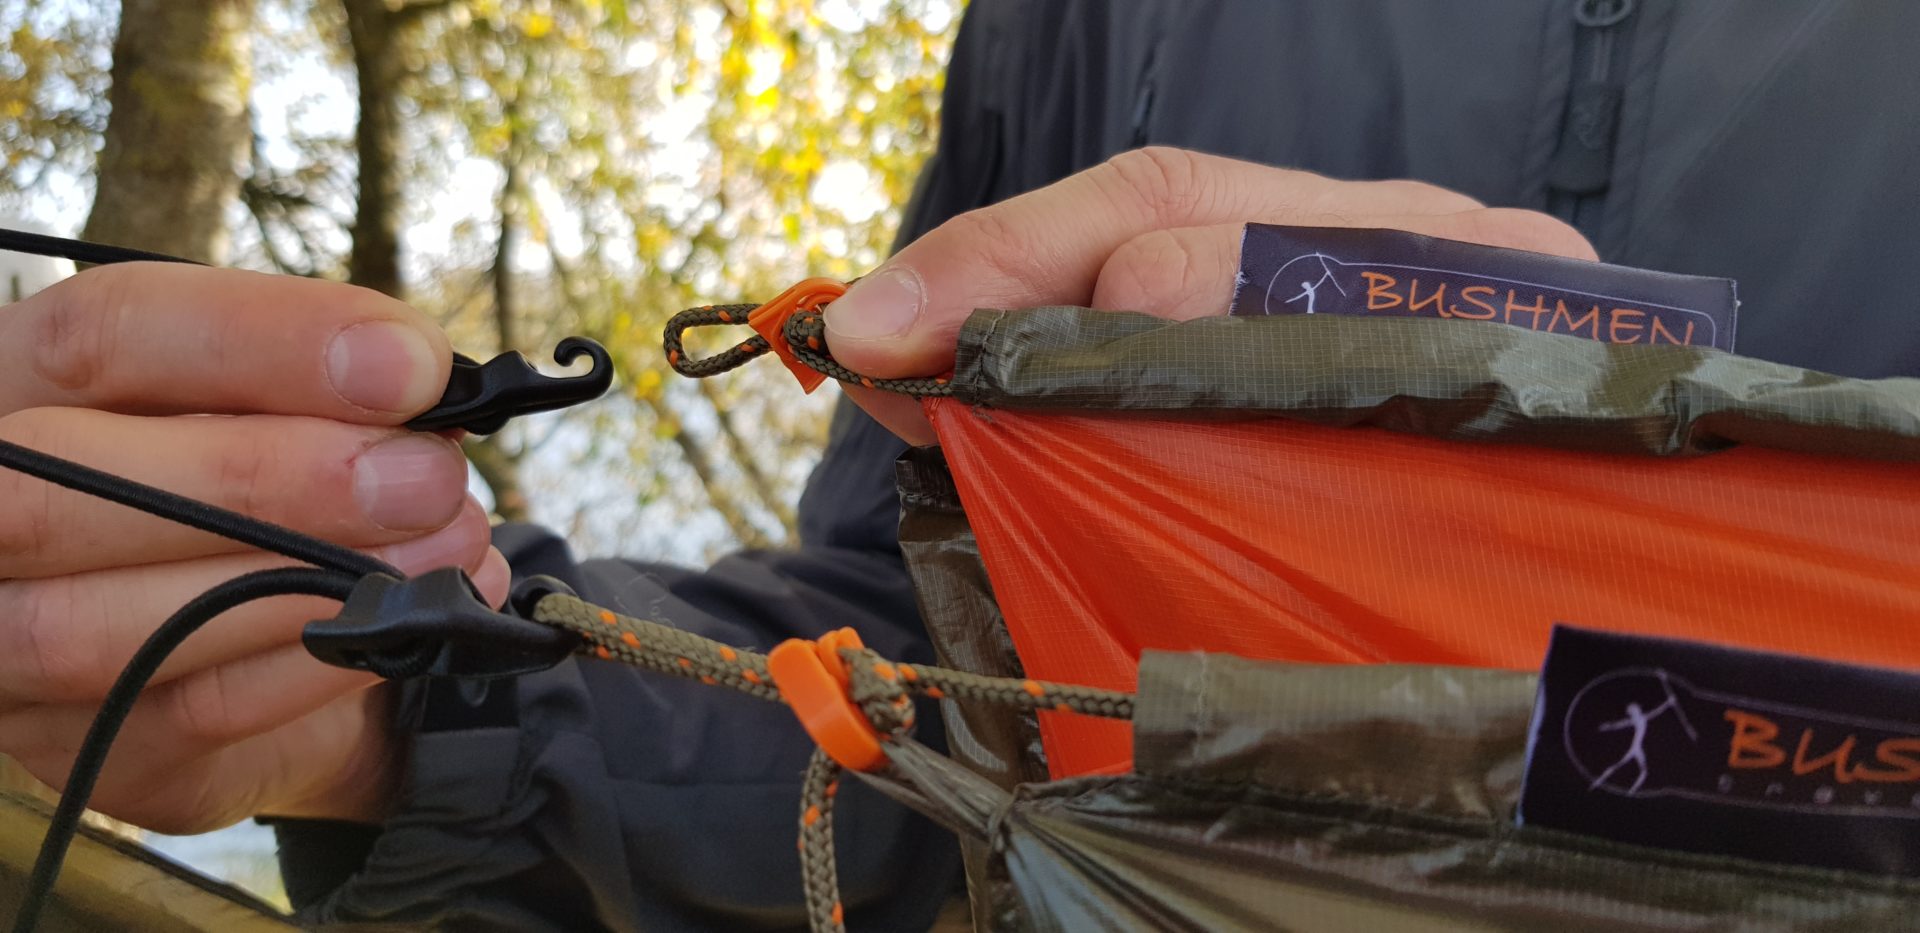
They are designed to absorb any stresses arising during use. In the situation that the stresses or forces acting on the headliner are greater than the stretch capacity of the expanders, the elastic cords of the expanders slip out of the hook handle.
This is the alarm signal and the intended way to protect the headliner from damage.
In this way, the plastic hooks on the ends of the expanders act as fuses.
Slipping the end of the expander back into the hook is trivial.
Lift the flap on the top of the hook. Slide the end of the expander into the gap formed between the flap and the main part of the hook, and close the flap.
Don’t let the end of the expander slip off the hook. It means that the forces acting on the sub-hook are too high and can cause damage. Slipping out of the hook that is not covered by the warranty.
Notwithstanding the utmost care in workmanship and the safeguards used, products in an ultra-light category are inherently more delicate and require more care than other equipment.
Please find below our hammock underquilt guide.
Hammock underquilt manual for the use with a hammock:
-
- Remove the underquilt from the bag, and shake it off to make the down expand more easily.
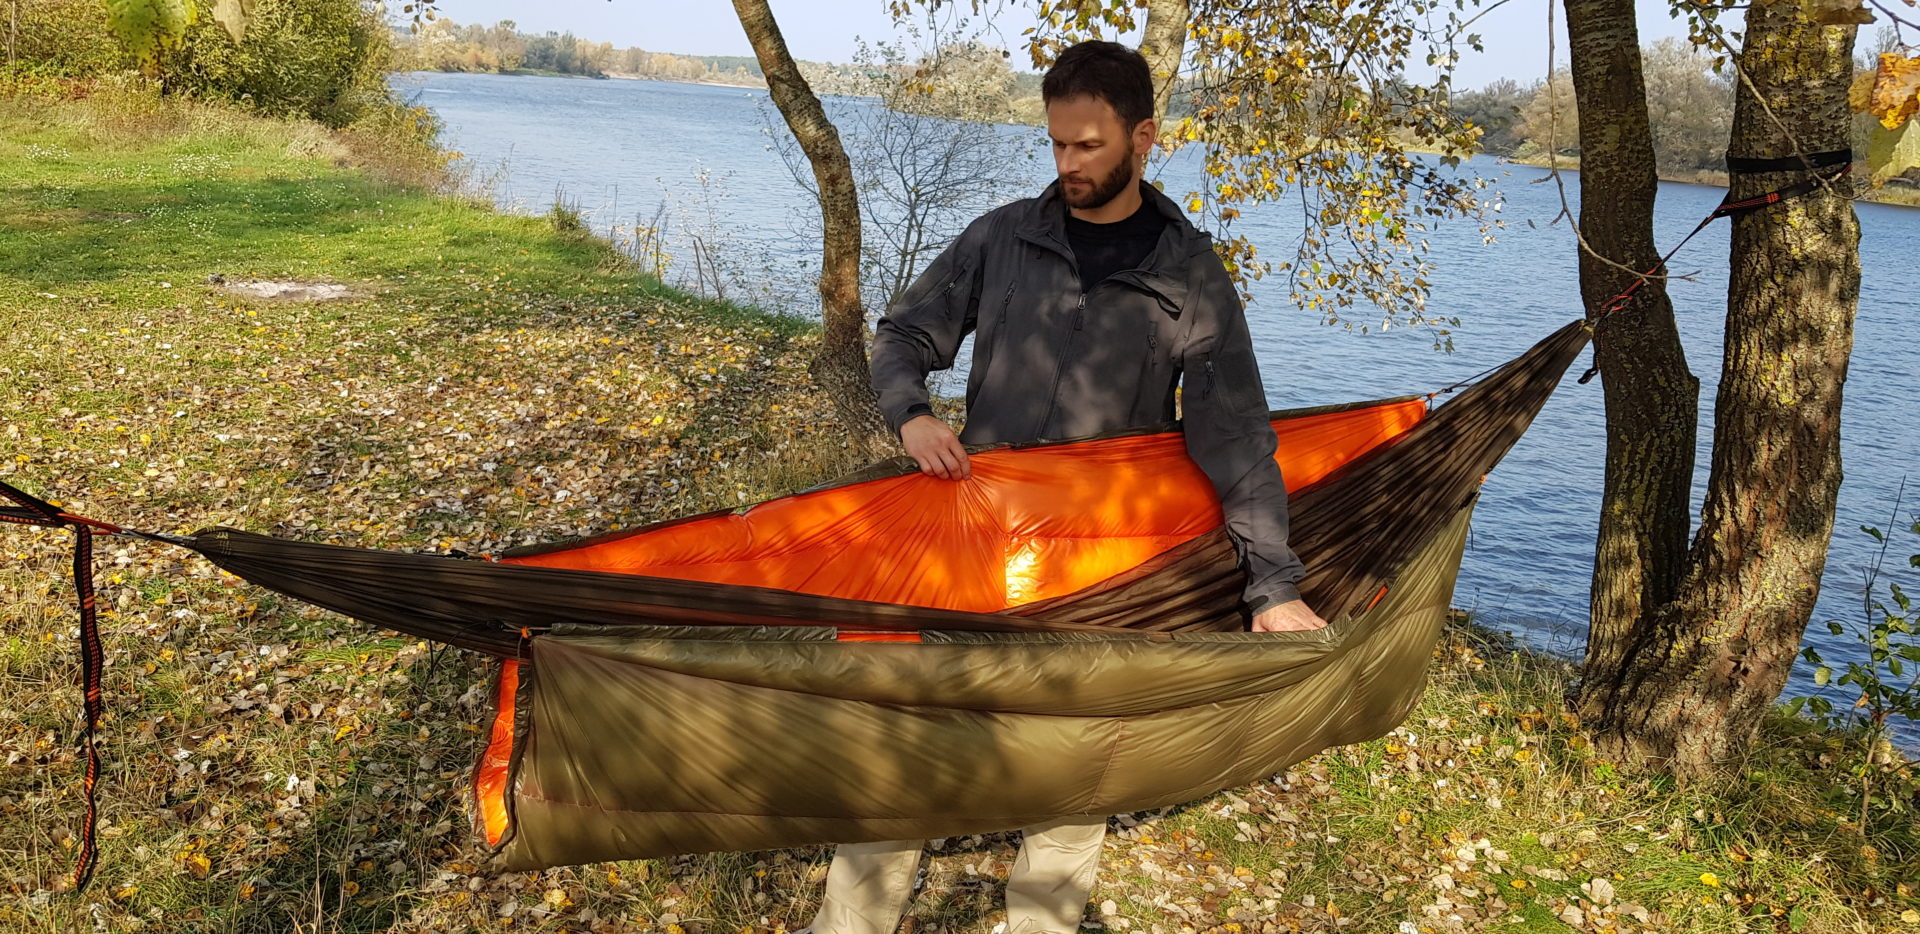
- Unfold the underquilt according to the planned sleeping direction inside the previously hung hammock.
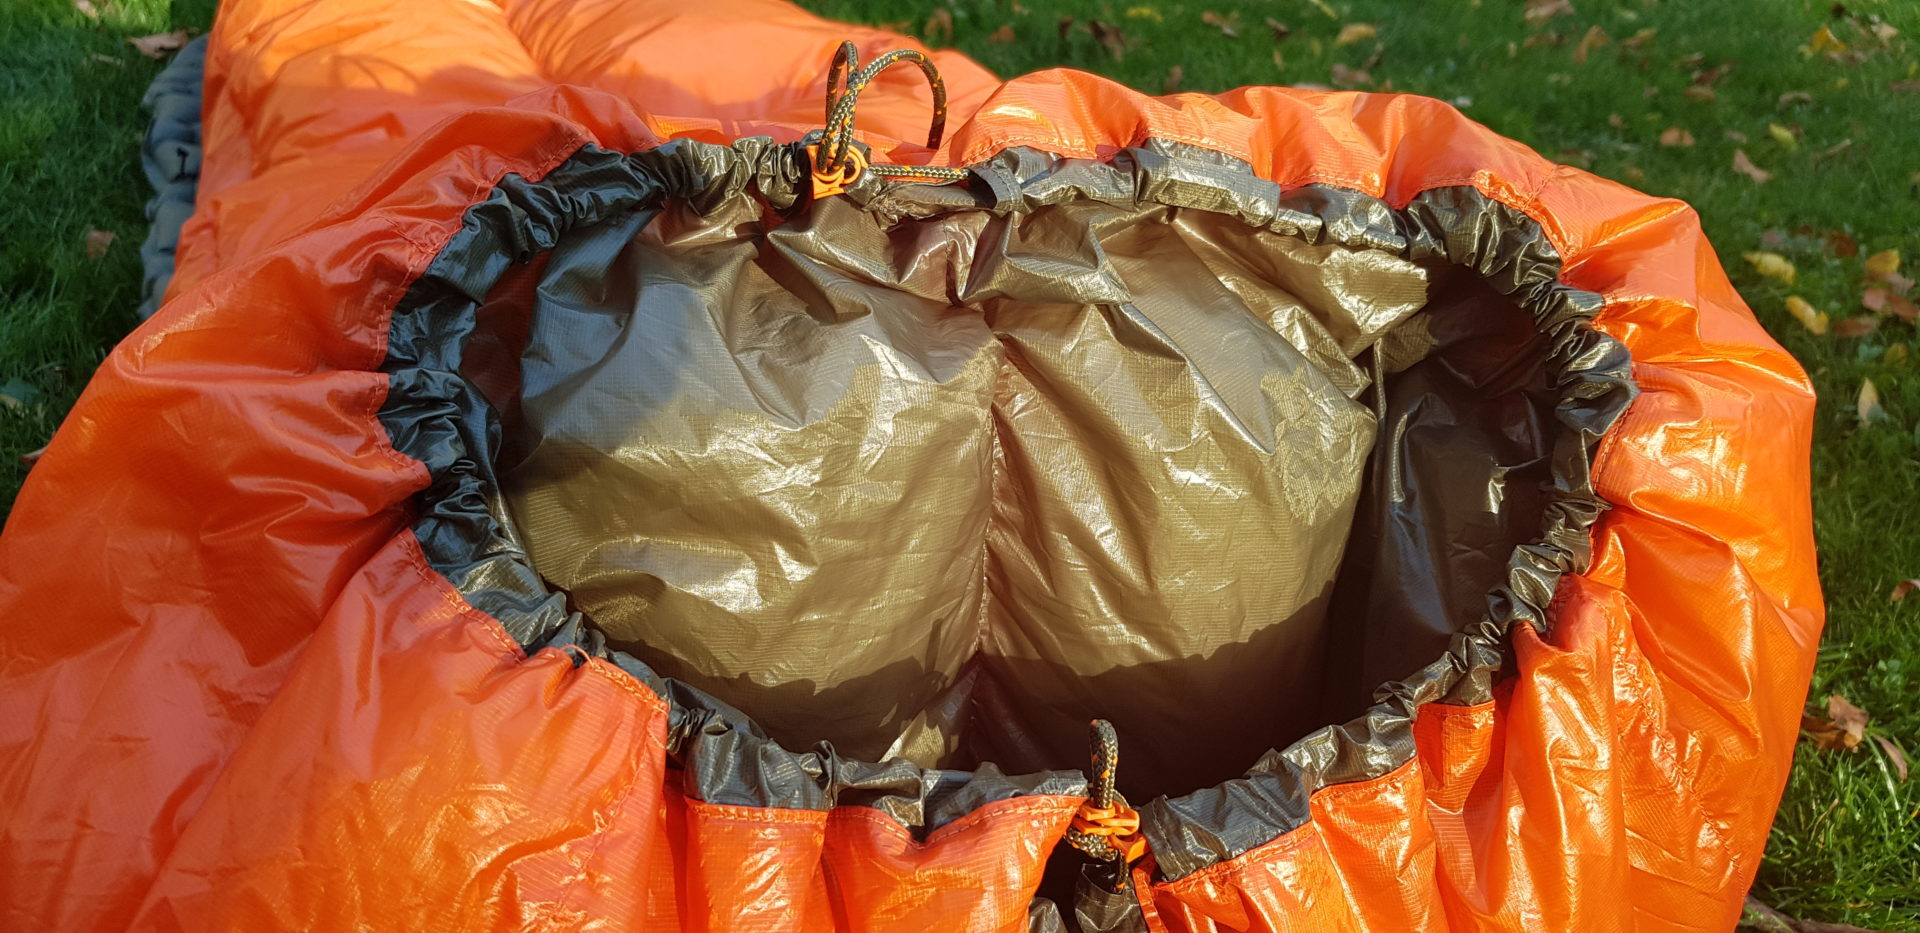
The narrower end is intended to cover the legs. The wider end is intended to cover the shoulders and head. - Hook the tensioners on the expanders to the loops at the corners of the under the quilt.
Put the expanders through the carabiners that connect the hammock to the rope/strap attachment.
Adjust the length of the expanders by moving the tensioners so that the expanders are taut but not yet working.
Hammock underquilt manual
- Slide the underquilt under the hammock. The bottom of the underquilt should hang slightly above the bottom of the hammock (about 10 cm). Adjust the shape of the underquilt with the pullers located at its ends.
As a rule, simply pull them halfway down. - Lay down in the hammock and adjust the underquilt so that it gently wraps the hammock.

Hammock underquilt manual
Adjustment involves selecting or loosening the expander overhead.
- Tensioning involves pulling the end of the expander. When you let it go, the tensioner will lock it in the preset position.
- Loosening involves gently lifting the end of the tensioner, which causes the expander to move. Releasing the tensioner the expander will be locked in the preset position.
Alternatively, correct the puller located behind the head. That gently supports the hammock underquilt from underneath.
Hammock underquilt manual for sleeping on the ground.

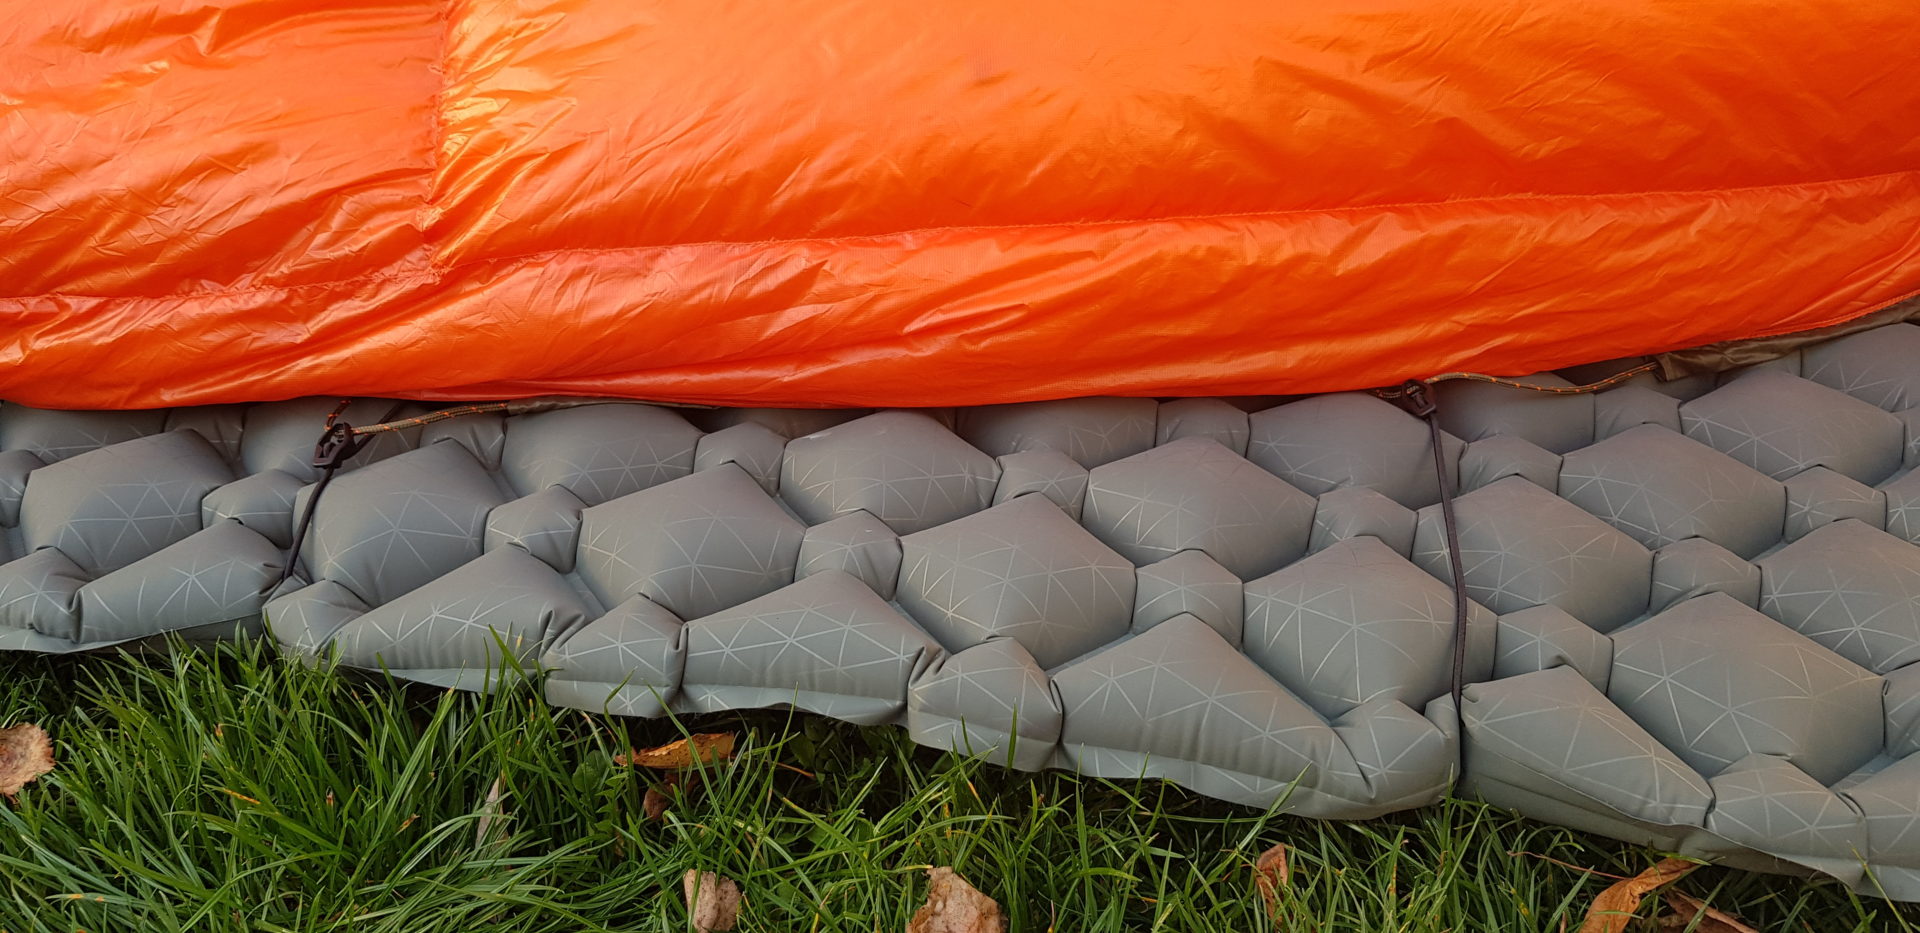
Underquilt can be used as an alternative to the sleeping bag or top quilt when you want to sleep on the sleeping pad.
Remember that the sleeping pad should have a proper R-value.
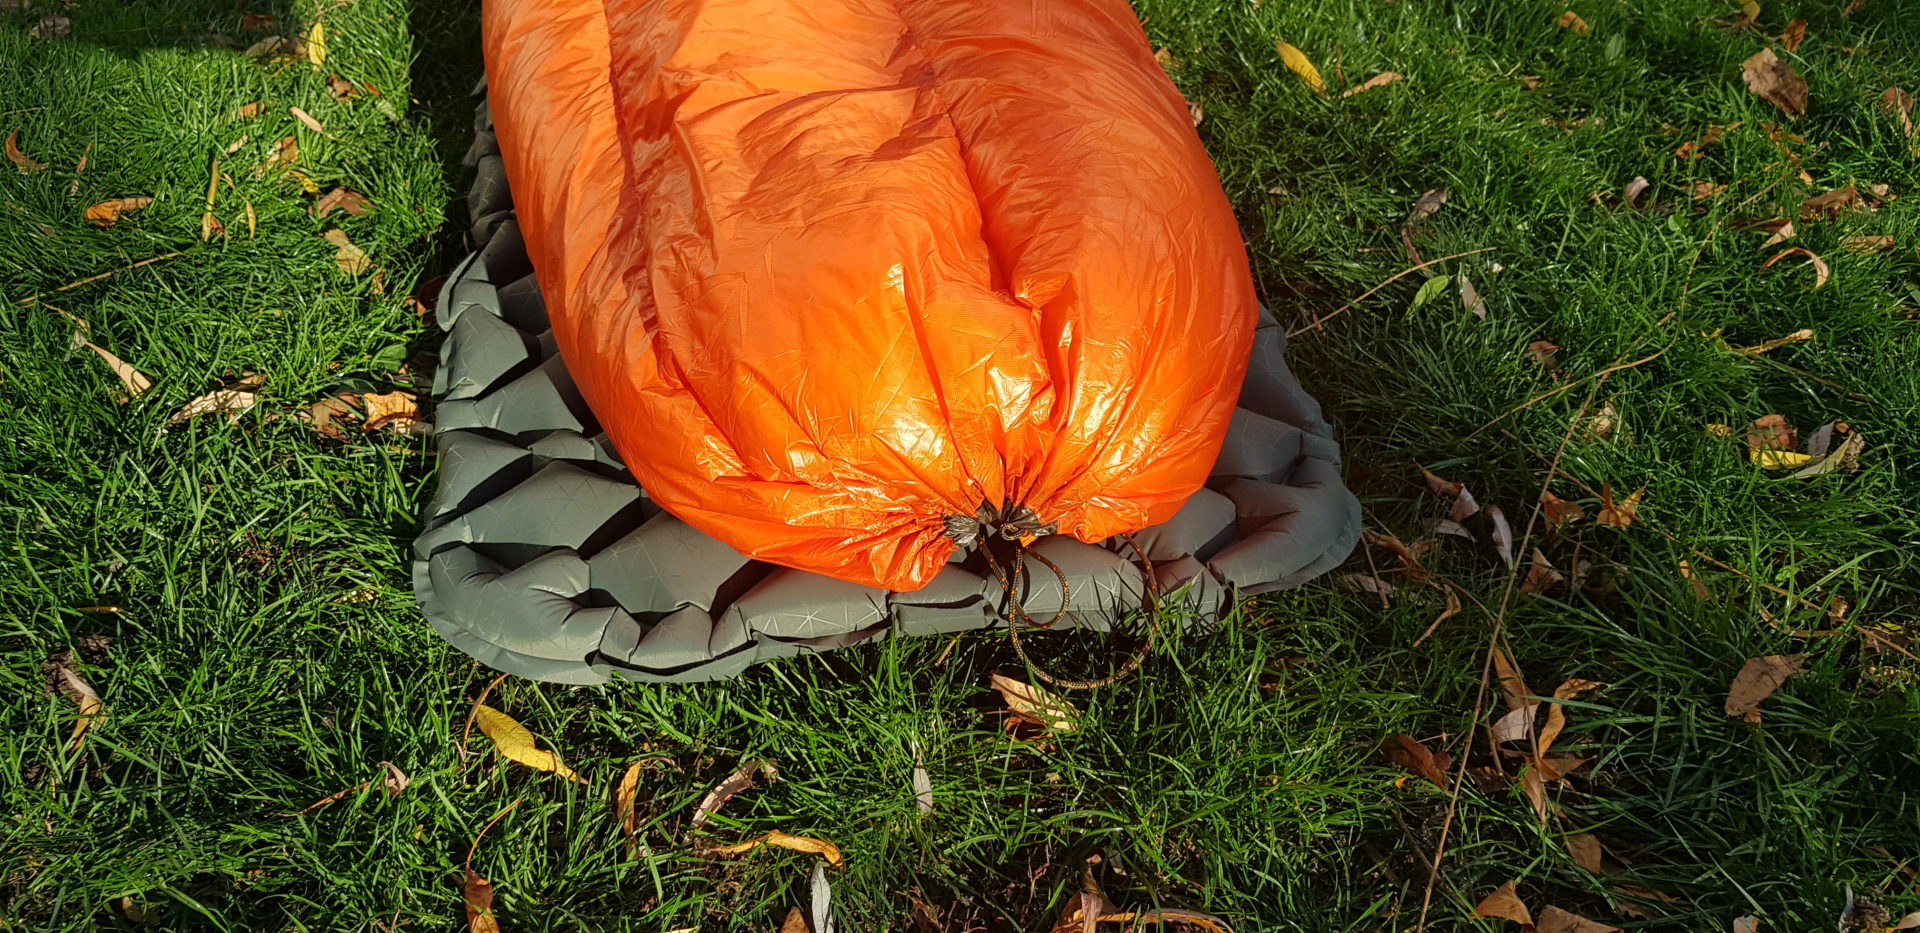
- Take the quilt out of the bag and shake it down, so the down will expand more easily.
- Make a footbox. Pull the cord on the narrow end of the quilt.
- Tide and gently tension the expanders over the sleeping pad.
Remember that the knot should be under or at the side of the sleeping pad. - Push one of the expanders down to the half way of the sleeping pad and another one to the place where you expect to have your knees.
- Make space for the legs.
Move together the tensioners at the expander placed at the level of the knees.
Hook them into the cords that you find on the edges of the underquilt. - Put your legs into the given space.
- Make a collar for arm protection. Tie the corner loops, and put the collar over your head.
Gently pull the cord placed under your throat so your collar will wrap your arms. - Place the tensioners at the expander that is at the halfway:
- When it’s cold, move them close to your body. Hook the cord – the underquilt will wrap you like a sleeping bag.
- When it’s warm, move them to the ends of the sleeping pad. Hook the cord – the underquilt will work as a nice quilt.
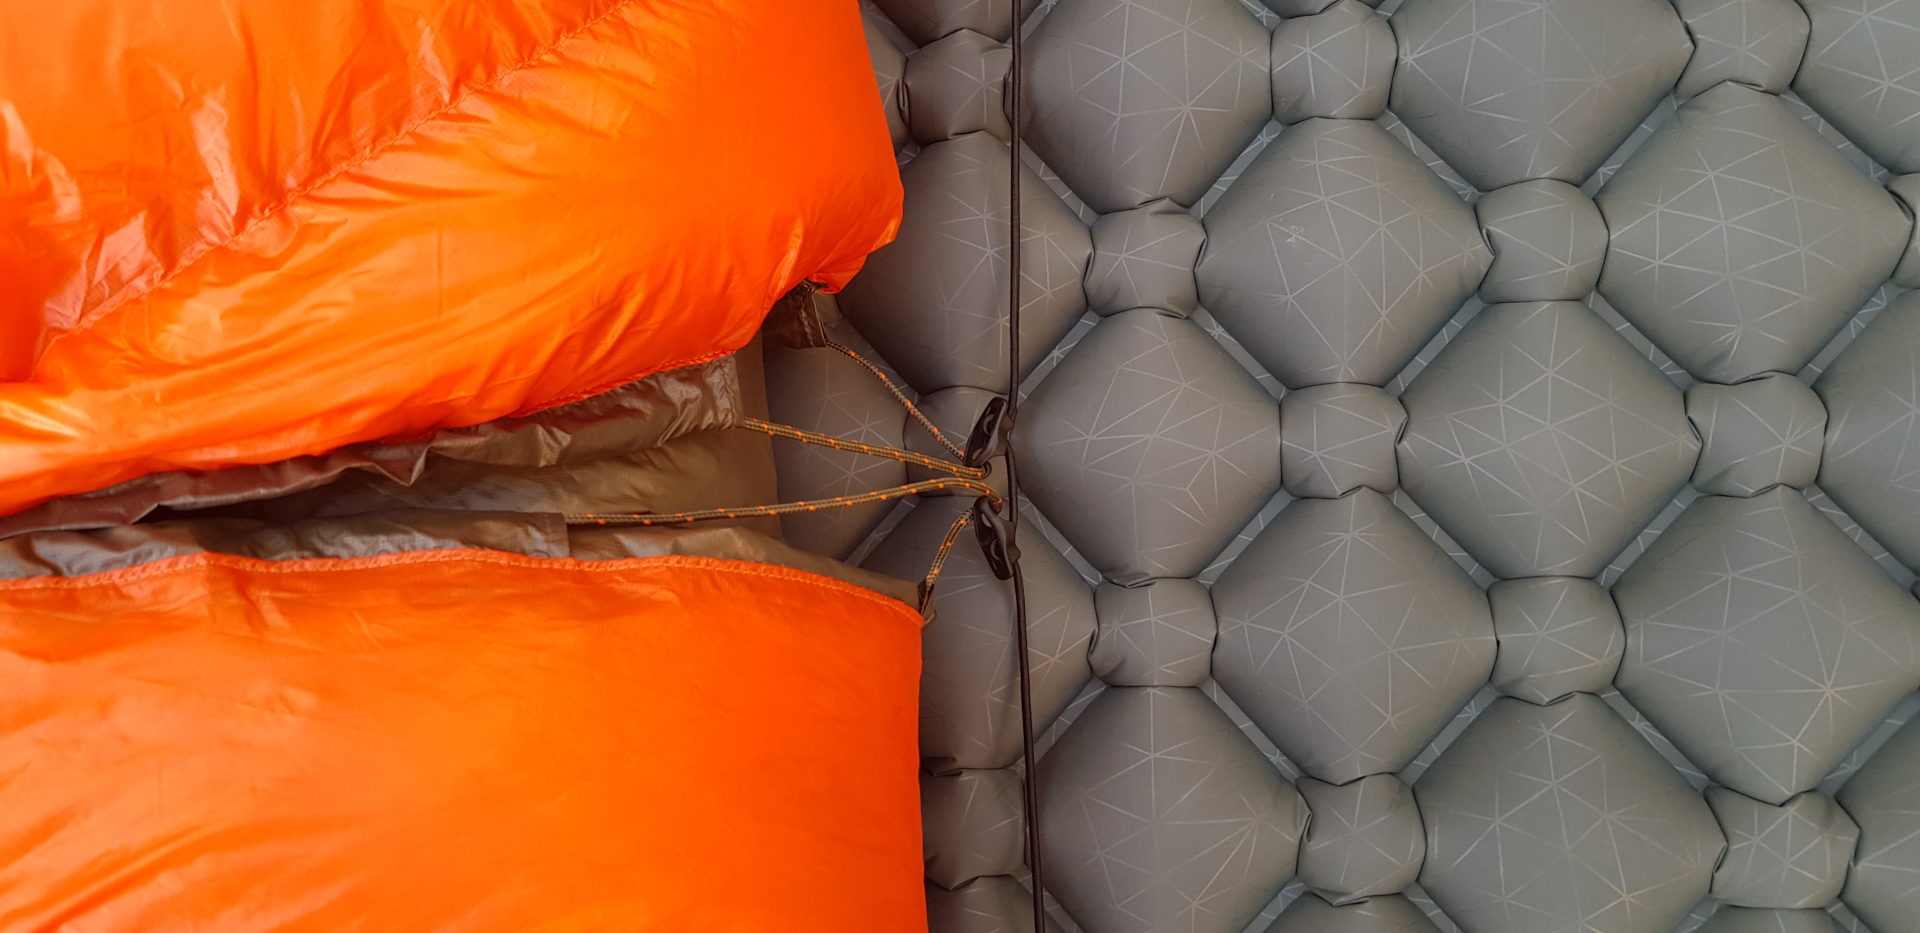
Cords hooked to the tensioners will keep the quilt in the proper position even if the cords are loose.
You can use the Underquilt GLOW just as a duvet.
Hammck underquilt manual – Packing
It is recommended to pack it into a double compression sack while traveling when a hammock under quilt is used every day. After stuffing it into the bag, you can tighten the opening of the bag. After a while, push it into the bottom part and further, compress it by about 30%.
When you are home and your GLOW is not in use pack it into the storage bag. Goose down will expand freely and will keep its isolation feature for a long, long time.
Caution!
- Do not tense the expanders too much – the underquilt works better if the hammock is wrapped gently.
- The temperature rating of the underquilt is given under the assumption that you are covered with a sleeping bag or topquilt with the same or higher comfort temperature.
- Before you go outdoors, test your quilt in controlled conditions.
- Protect your sleeping place from wind and rain (e.g. use the Tarp).
Good practice while sleeping outdoors:
- Warm up your body and eat something before sleep.
- Satisfy physiological needs.
- Put on dry clothes, including a cap.
- Do not cover your mouth and nose.
- Do not drink alcohol before sleep.
- Please be advised to read more about the comfort temperature rating here!
Hammock underquilt manual – Cleaning
Rule 1
– The less often you wash down gear, the longer the down will retain its full properties.
Like feathers, feathers of water birds in particular have a naturally thin layer of fat that protects them from excessive soaking and improves their thermal properties. Washing can damage this layer over time.
If you can limit yourself to wiping the soiled surface of the gear with a damp cloth or sponge then go for it.
Of course, after prolonged use, sweat and dirt will require a thorough refreshing.
Rule 2
– Take your down gear to a specialist laundromat. Your equipment will be clean and you will keep your warranty.
It is just safe to give down gear such as sleeping bags or hammock underquilt to a professional laundry that specializes in washing down products.
We have a guarantee that the cleaning and drying process takes place at the right temperature and in the right way, while the washing agents have been used in the right concentration according to the manufacturer’s recommendation.
In this way, you will avoid many problems that can make more harm than good finally.
This option will save you a lot of time and nerves.
However, this is not always possible.
Therefore, below you will find general recommendations in case you need to wash in a washing machine or by hand.
NOTE!
We do not take any responsibility for the result of self-washing. Problems that may be caused by self-washing are not covered by the warranty.
Washing down products in a washing machine
Before using the washing machine, remember to clean it from the detergents used so far and wash only with dedicated washing agents. We recommend using, for example, Universal Down Wash, Grangers Down Wash, or Nikwax Down Wash according to the instructions given.
Home laundry detergents are too aggressive and destroy the natural layer of grease that protects down from moisture and destroys the artificial cover in hydrophobic down.
Before you put your down gear in the washing machine it is a good idea to soak it in warm water while it is still in the compression bag. This will make it easier to get it wet as the down spaces are not yet filled with air. Before putting it in the washing machine, take it out of the bag and put the wet one in the drum.
Run the program according to the washing recipe. Usually, it will be a gentle program, 30 degrees, with minimal spin. If you are going to tumble dry your sleeping bag (or sleeping pad), remember to use sets with special balls that additionally break down clumps during drying. In an emergency situation when it is not possible to use dedicated balls, you can use, for example, ping pong balls or balls such as tennis balls. After gently spinning, add balls to break up the down clumps and set the drying for 1 hour. After this time, take out the underquilt to break up the clumps, and put it to dry for another hour. Repeat this process for several hours until the underquilt is fully dry. When the underquilt is dry, check carefully to see if any clumps remain. If clumps have formed then gently separate them with your fingers.
Hand washing of down gear
Start hand washing by immersing the down gear packed in a compression bag in warm water. The water of 25-30 degrees is warm water (not hot). If you have any doubts about the temperature then add cold water. It is safer for your down if the water is too cold than too hot.
The underquilt should be immersed in a compression bag so that the water will penetrate the entire interior of the washed gear faster. It will save a lot of time by removing air from between the down spaces.
Next, add the appropriate amount of detergent (according to the manufacturer’s instructions) to wash your down items.
Remember not to use regular detergents.
Take the wet down under-quilt (sleeping bag, top-quilt etc) out of the bag and gently knead it. Be careful not to tear the washed items. The water and detergent can be changed during washing.
After washing in dedicated detergent, rinse it in plenty of lukewarm water. Rinse and knead until the rinse water stops foaming. This is usually quite a long process especially when the water is soft. Such cycles of rinsing and kneading can be up to a dozen. After careful rinsing, squeeze the water by rolling and squeezing the under quilt. Remember not to wring or wring the down item, as this may tear the outer material.
Drying down products
Drying after washing by hand is a process that can take several days and requires frequent intervention.
Like a sleeping bag, we dry the underquilt horizontally in a warm and airy place – preferably on a dryer.
Thanks to drying on a dryer, the air has access to both the top and the underside.
Remember to keep the entire surface on one level, this will reduce the amount of down clumping. Down products require frequent turning from one side to the other and kneading similar to what we do when washing. Kneading and crumpling prevent the down from clumping and restore its original resilience. When kneading, pay attention to the clumped balls of down. Separate the down gently with your fingers and, especially resistant, gently shred it. This process is tedious and usually takes several days.